D.I.Y Natural Wood Dresser
If you have been following me on instagram (IF NOT, COME CLICK HERE AND SAY HELLO!) you would have seen the quick, easy and cheap DIY project I just recently tackled. Using this quarantine as a time to redecorate/reorganize my entire household, I decided it was time to address my living room situation. What is currently just this mess of a room, I wanted to clean it up. However, as a stay at home mom on budget, I want to do what I can without spending a fortune.
As I have talked about before, Facebook Marketplace is my go to when it comes to furnishing my home. Yes, while there are some things I will buy brand new, I also try and refurbish what I can. I love little projects like this for multiple reasons but mostly because of how budget friendly and cathartic they can be. Seriously though, if you’re a mama in need of a break and stress relief, pick up a power sander. I promise, it will be just the thing you need to blow off some steam. Better yet, pair that with a glass of wine and you’ll thank me!
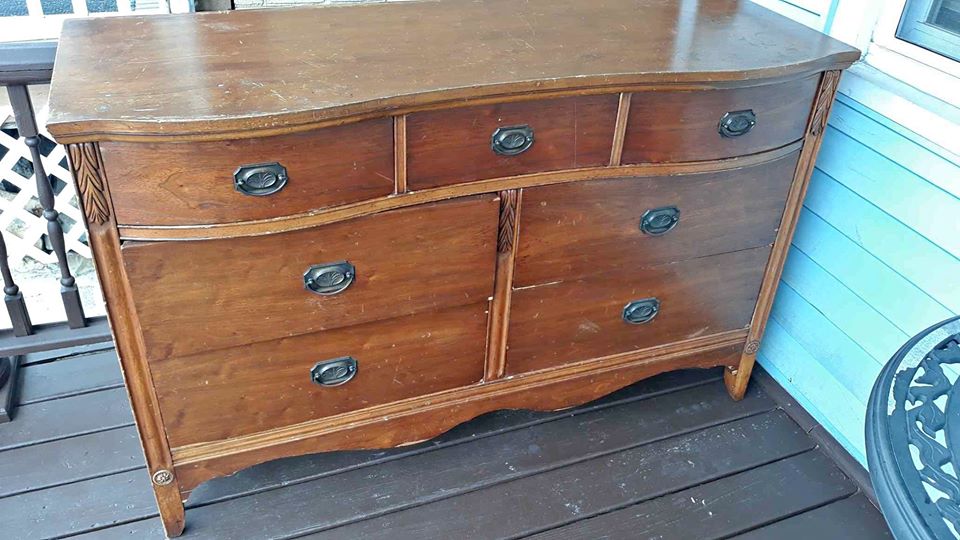
Anyway, with this is mind, I found a gorgeous but beat up antique dresser. For just $100, my husband was able to pick it up from a local seller and 2 hours later, we ended up with a beautiful staple for our living room. Seriously, if you can look past the exterior, carve out a little time, and put in a little work, you can end up with amazing results.
So before I walk you through what you’ll need, should you want to try this out yourself, lets do a little before/after.
Before:

After:


Incredible, right?!? Keeping all the original hardware, this piece turned out better than I could have ever imagined. It is perfect to help give our living room a little life!
Have a piece you want to do this too? Awesome, you can do this with anything you want. Regardless of if it is painted or stained, as long as its made out of wood, you are good to go. Take a look below and I will walk you through it all!
What You’ll Need:
Power Sander: This is the one I use and absolutely love
60 & 220 Grit Sand Paper- They sell ones specifically for your power sander
Water Based Polyurethane : Make sure it is a water-based poly. Especially if you are applying over a lighter piece. If not, you’re piece will yellow and look not so pretty
White Furniture Wax: You can always make you’re own with regular furniture wax and white paint but if you are wanting to skip that step, check out Behr. This stuff works great and is one of my favorites!
Paint brush– This is one I love using for pretty much everything
Clean rags
Getting Started:
- First thing first, make sure you are working in a clean and open space. Sanding greats a whole lot of dust, which if you aren’t careful, will get over everything. Actually, now that Im thinking about it, make sure yo have a old pair of clothes you can wear and not worry about ruining and then a face mask. Trust me, you don’t want to inhale all that stuff!
- Time to get on sanding. Take your 60 grit sand paper and go to town. Your goal is to remove as much of the original paint/stain from the piece as possible.
- Once everything is sanded, its time to poly. Apply a thin coat of the water based poly to your entire piece. Let it dry and then take your 220 grit sand paper and lightly sand until smooth. Clean off the dust and reapply another coat of poly. You can repeat this process as many times as you’d like.
- Once all the poly has dried and sanding complete, apply wax with a paint brush to dresser.
- After all areas have been coated with wax, use clean rag to wipe it off.
- Let cure! Don’t set anything your dresser for 48 hours in order to make sure surface has enough time to set
And that is it! Seriously, this is the simplest furniture transformation with the biggest reward!
So tell me what, are you waiting for?

April 24, 2020
© 2022-2023 The Very Mary LIfe LLC.
WebSite Design by Social Darling Studio
Privacy Policy
Terms and Conditions