Laundry Room Makeover
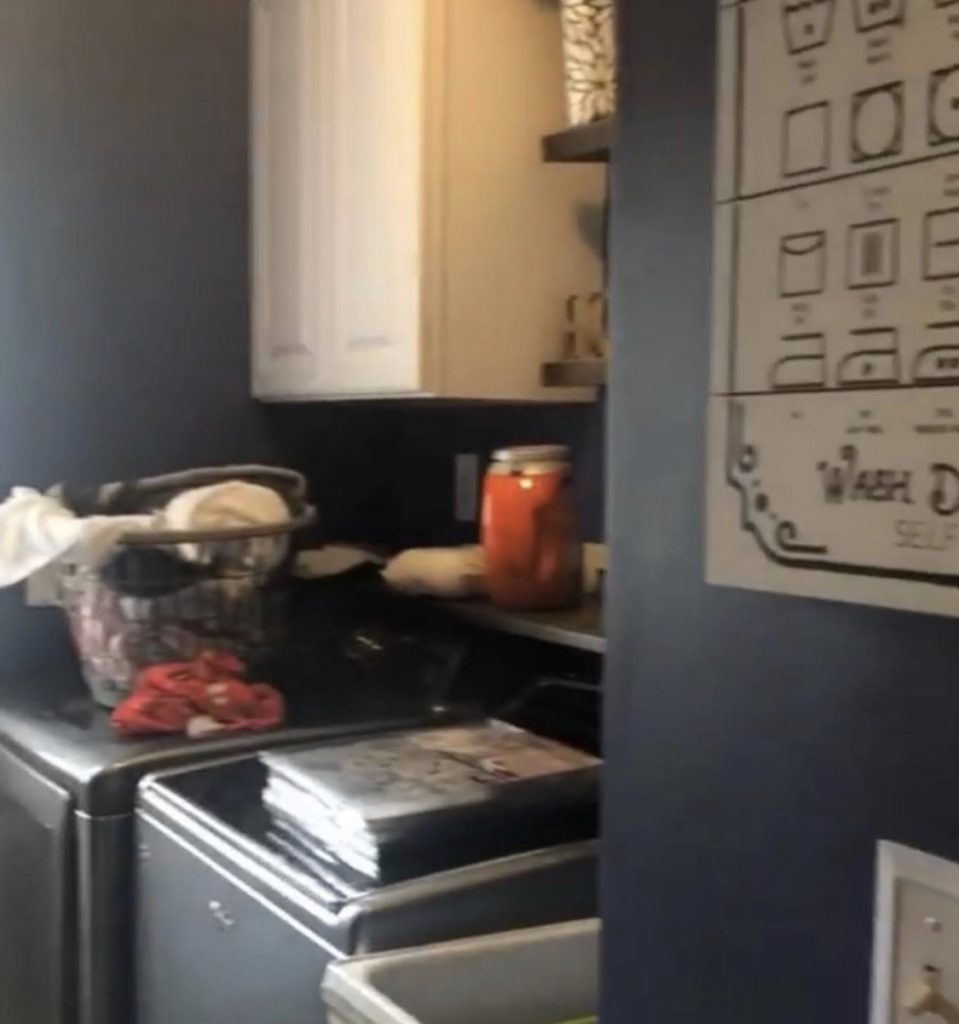
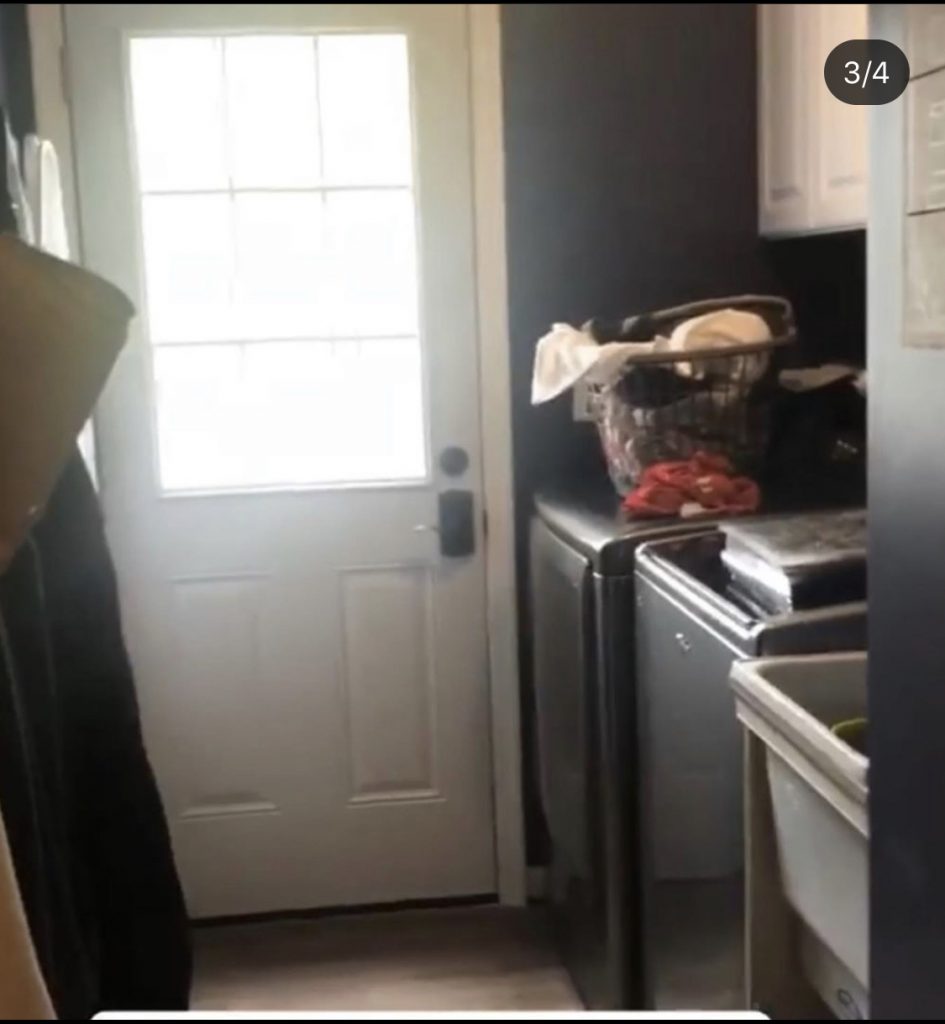
When we first moved into our home (a little more than 2 years ago exactly), I used all of my saved up money to hire professionals to paint a majority of the rooms, including our laundry room. I had a previous color I had like for our bathroom back in our old home, so I figured I’d just stick with that. No testing it, no reconsidering, I went forward and as you can guess, I HATED IT!
So after paying a nice $200 for this catastrophe of a room, I sat for a whole year, hating my decision. It was way too blue and way too dark, still kind of gross and while I think laundry will always be one of my most hated chores, the room’s aesthetic certainly didn’t help motivate me. Finally though, thanks to wonderful COVID [note the sarcasm] and New Jersey lockdowns, I had the excuse and time I’d been needing to start a new project. Not willing to spend any more money on this room, I did this all myself and all for under $250. Yes, I know that technically means in the long run I spent $450 on this project, but we’re just going to pretend like my waste of money never happened…
BEFORE:
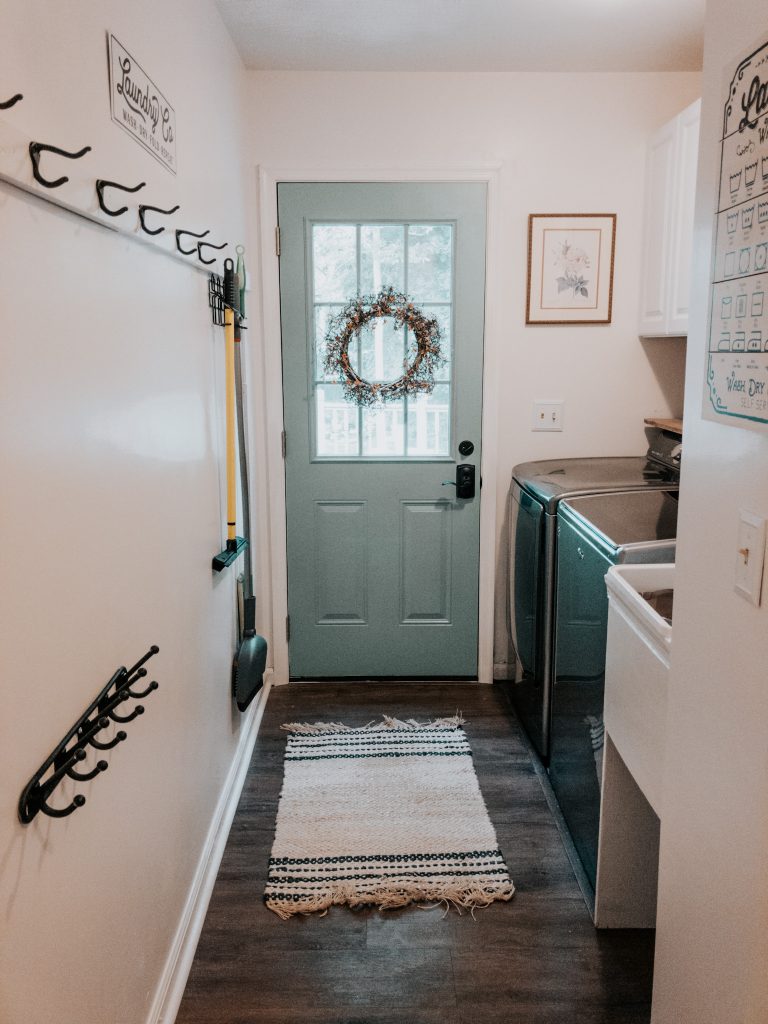
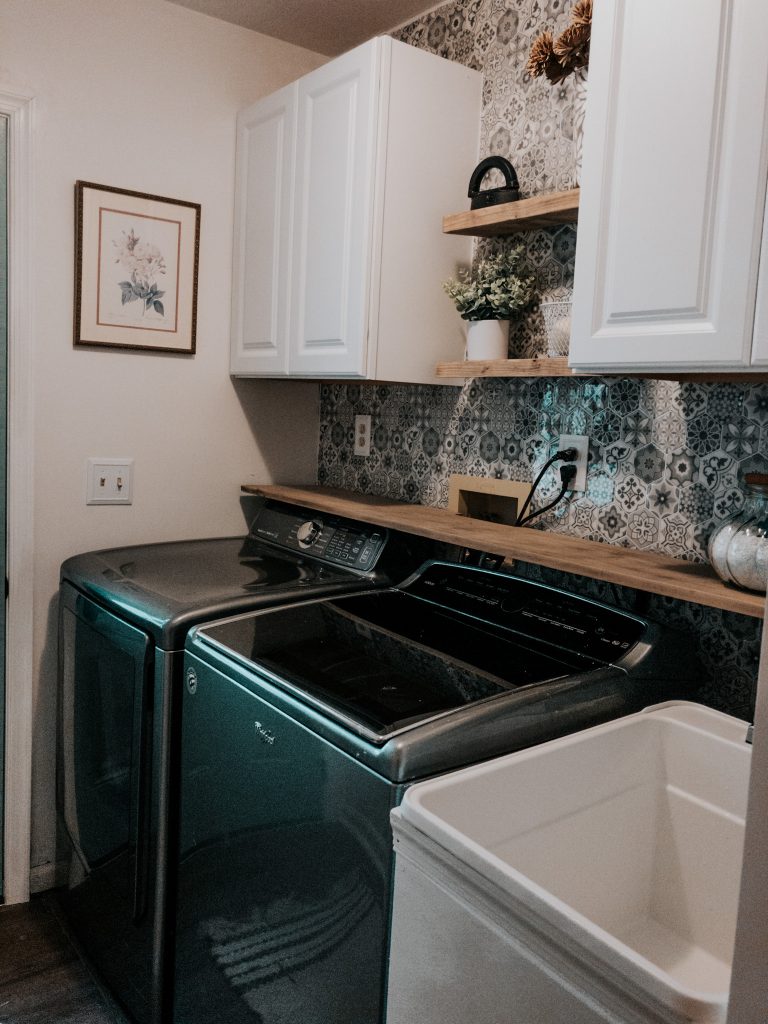
After:
Walls
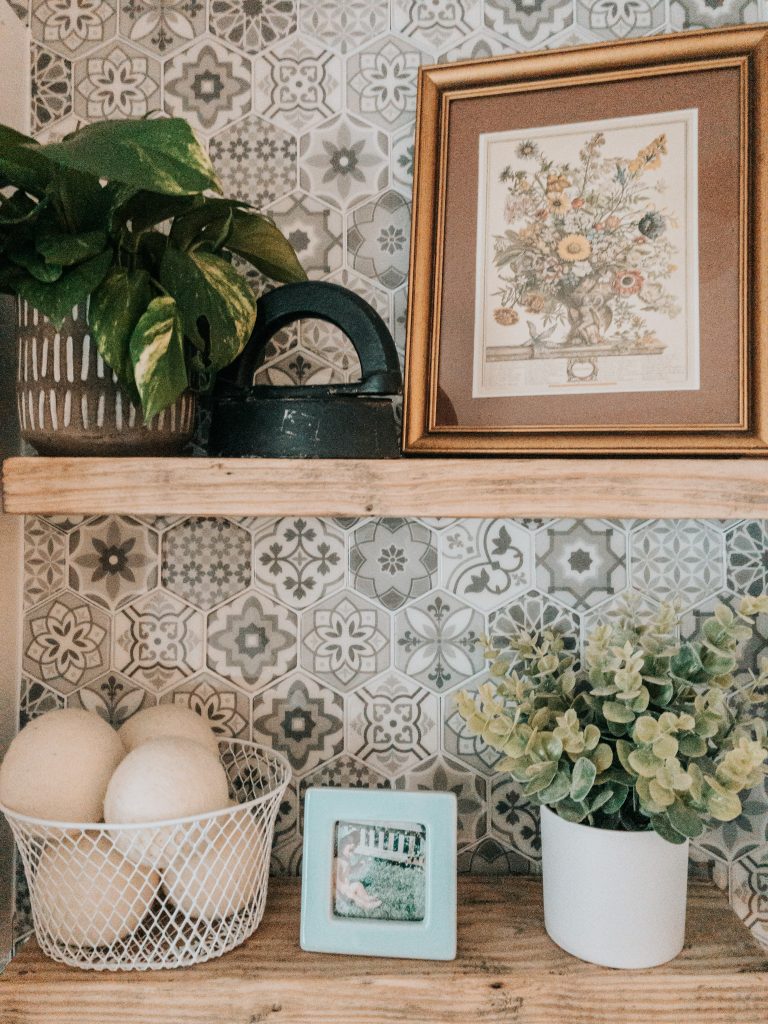
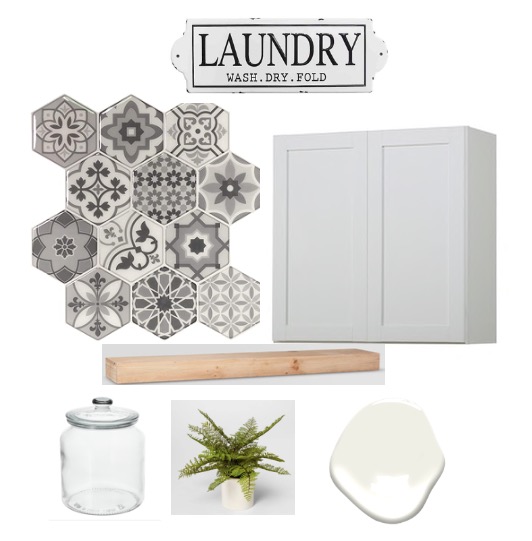
Starting off, I think its best we begin with the biggest change of all–the walls. Lets start off with our accent wall. Knowing that I wanted to give our laundry room a little change but within budget, I knew hiring someone to install real tiles weren’t an option. However, after seeing ads and good reviews for peel & stick tiles on amazon, I figured I’d give it a go. For this specific space, I only needed 4 orders of the tiles since 10 sheets come in a one pack and measure a little under 12×12. On top of being super easy to install (its like a giant sticker), they were super affordable and don’t require really any other tools for install. Scissors and a ruler are all you need, incase you have to make cuts. Done in less than two hours, this part of the project was so simple and made such a big impact. Oh and incase you are wondering about upkeep, its been over 2.5 months since installing and they are still stuck good the wall.
As for the rest of the walls of the room, I went with DuJour White by Valspar. Recommended to me by a great Instagram account, @littlelattihouse, this white is as close to perfect as white paints come. It’s not too cool or beige, has no pink, blue, grey, or yellow undertones, and is just dreamy. In fact, I will probably end up using the same exact color when it comes to us redoing our bedroom because it’s just that perfect.
Sink
When we moved in, there was already a plastic slop sink in place but it was old, stained, and just plain gross. Additionally, the house’s previous owners built the stand it was resting in, which was a little rough looking. I’m pretty sure they built it with scrap wood. When I first planned this makeover, I really wanted to rip it all out and get a nicer sink. However, I soon realized that this would have been a much bigger headache because when they installed our new floor, they installed it around the existing plywood. Had I taken it out, there would have been a big gap of no floor to work around. So with that being our situation, I had to keep the wood stand and decided to just replace the sink. After installed (a job I’m proud to say we did solo), I then decided to take a thin piece of plywood and use it to cover the base of the sink. I then topped it off with a fresh coat of paint and while it’s not the nicest thing, it is 100x better looking. Plus it ultimately saved us money to go this route so I really can’t complain about that!
Shelves
Even though it’s hard to tell in the before pictures if you look closely enough you will see what the shelves looked like originally. Both are pure wood and used to be in a dark stain. The middle two were actually purchased from amazon while the lower shelf was one I constructed with the help of my dad. It was also stained in a dark walnut to match. While I could have kept them the same, I have such a love for all things light/natural wood. Because of this, I decided to strip them down. Using just a palm sander, it was long and tedious work but it was totally worth it in the end.
As for brackets under the long shelf, these are the ones we went with.
Hardware
Spray paint has come so far in the past couple of years! Seriously, they have paints that look like metal, sea glass, chalk paint, and more. Don’t believe me? Go to any hardware store and look at their selection.
For this project, I had the existing hooks that I really didn’t feel like replacing completely. Instead, I decided to buy this flat black spray paint and they look SO GOOD! I have actually used this paint for doorknobs and lamps in our home and they also turned out so great. Highly recommend this paint.
Decor
Last but not least, I grabbed what little decor I could find from my new favorite store, Habitat for Humanity Restore. I had no clue our town had one and after recently discovering it, I am a frequent buyer. Best of all, all of the decor I find from there is usually from the dollar shelf. In fact, I recently found a vintage laundry wash board and paid 58 cents for it!
In the future, I plan on making a new post here about how to navigate a thrift store because while it can be overwhelming, it can pay off tremendously.
Now, tell me, what do you think the chances are of me actually enjoying laundry? I’m thinking zero but hey, miracles happen!
August 5, 2020
© 2022-2023 The Very Mary LIfe LLC.
WebSite Design by Social Darling Studio
Privacy Policy
Terms and Conditions